Not an uncommon problem – a shredder that is just so full up it just can’t manage another sheet! These are designed to stop things being poked into them, other than paper, so off with the covers. As expected this revealed the shredding rollers totally bunged up causing the strippers to bulge and stopping the micro switch from working.
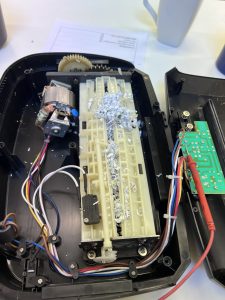
It was all so tightly packed that the end frame needed loosening to get the paper free which was carefully picked out and finally the rollers lubricated, and reassembled.
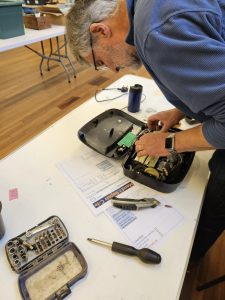
The unit was finally tested both functionally and PAT tested before being returned to a grateful owner.
Unfortunately the bin it sits on wasn’t brought along, this contains a safety pin which prevents the unit from operating without the bin in place – to stop fingers getting shredded, so we couldn’t test with actual paper.
Please bring every thing with you when you come so we can test the unit before and after the repair.
Tips
- A bit of oil, or lubricated sheet, after every bin of shredded paper helps keep the rollers free of waste.
- Make sure the bin doesn’t get over full, this drags paper back into the rollers.
- Keep the best for last! A nice flat sheet of paper or card at the end helps clear the rollers.
By Vilnis Vesma
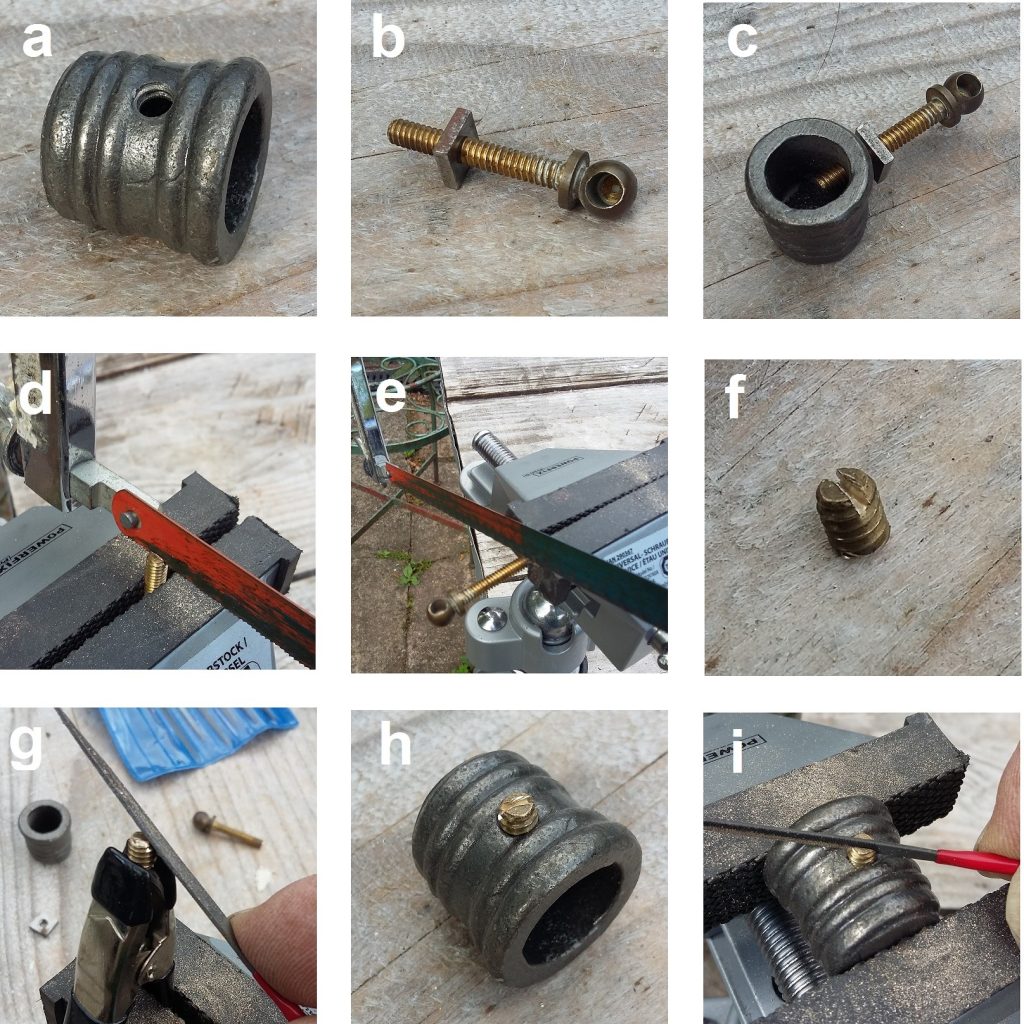
One of the finials on a curtain pole (a) had lost its grub screw which kept it in place. Tried an M5 metric bolt (wrong thread pitch) and a Meccano bolt (too small) then rooting around in my box of random hardware I noticed that the threads on the stud of an old drawer pull (b) looked about right and indeed they were (c). So I sawed a slot in the end of the stud (d) and then cut a short length off the end (e). Note the end is held in the vice because I didn’t want to lose it. There we have it (f) the basic grub screw. Deburr the cut end of the thread (g), pop the new screw in place (h) and finally widen the slot with a file (i) to accommodate the screwdriver head. Simples…
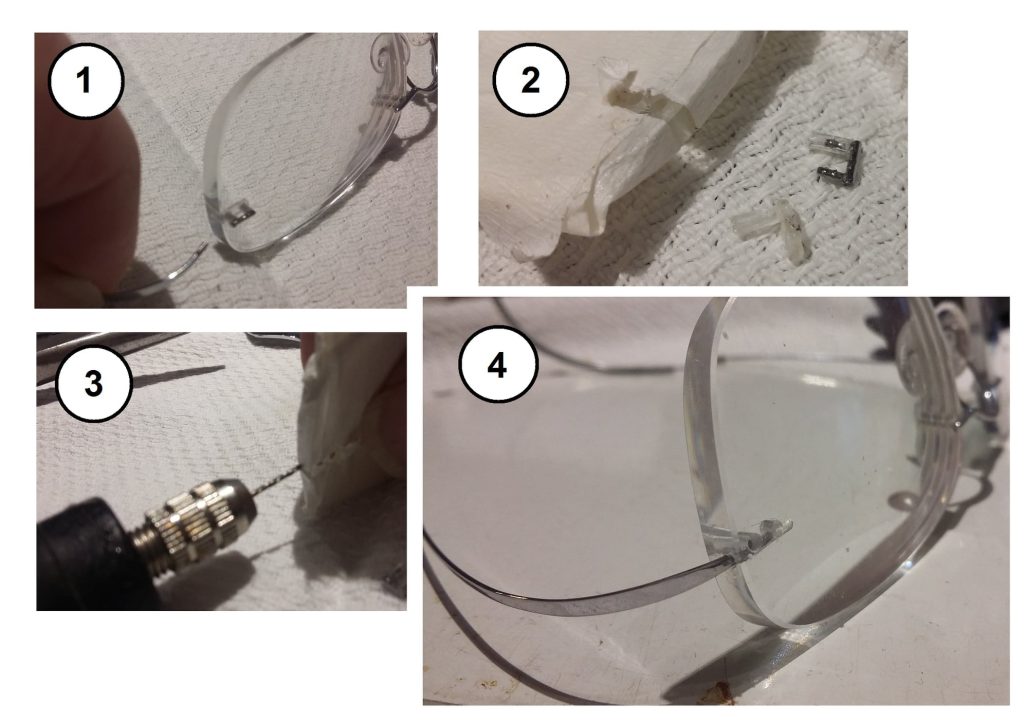
RIMLESS GLASSES: this was a real challenge. One arm had broken off at the root (1) and there was no chance of fixing the break. First job (2) tape over the lens to protect it and dig out the old fixings (two barbed metal prongs pushed into plastic sleeves through holes in the lens). Next (3) drill sideways into the lens and (4) glue the wire end of the broken side-arm into the new hole.
By Vilnis Vesma
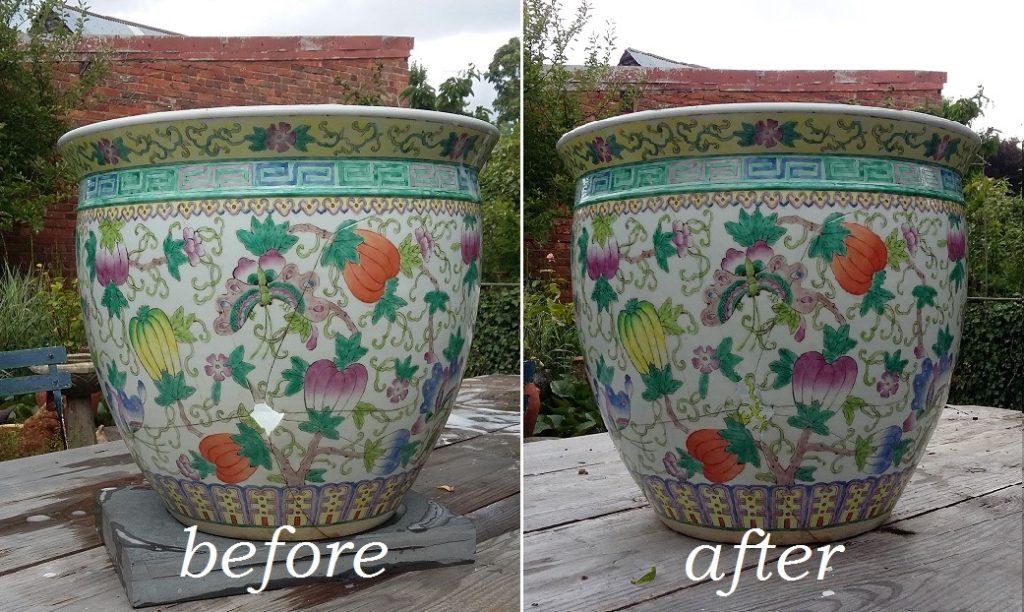
CHANNELING KIRSTEN FROM “THE REPAIR SHOP”… I have become a total fan of epoxy putty. To deal with this hole in the side of a ceramic planter I used a steel-filled putty which bonds well to concrete and glass etc. Hard enough to sand down in 20 minutes, painted with a coat of B.I.N. primer (dry in 15 minutes), pattern loosely touched in with watercolours and sealed with a coat of metal lacquer to give it a glossy finish.
You can still see the join (as they say) but OK for a little over an hour’s work.
Fixing your small personal and household items